
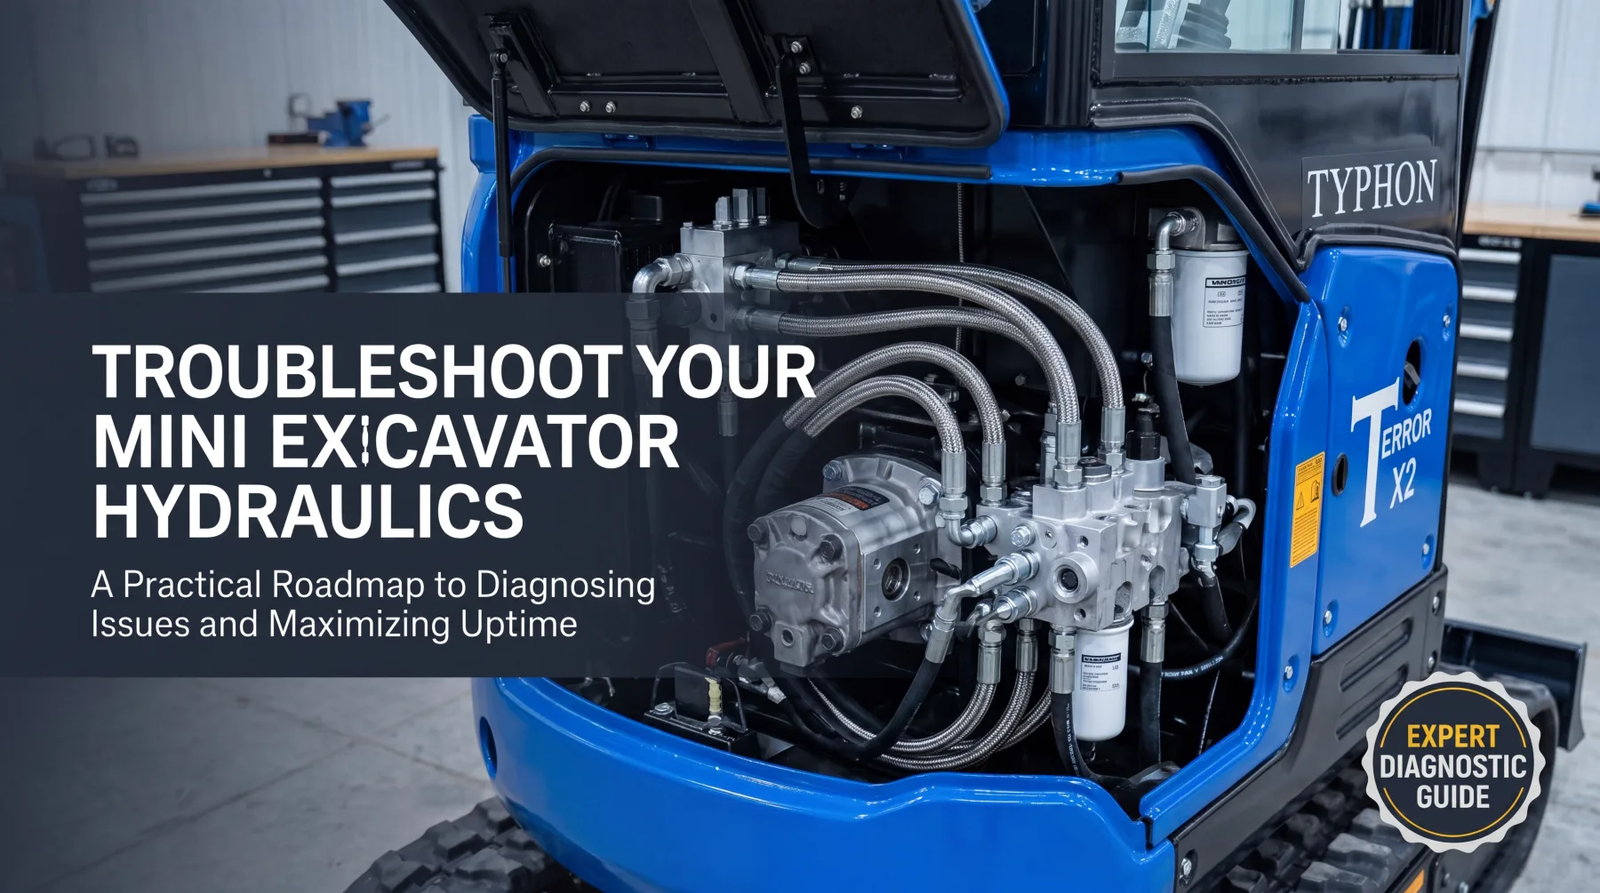
How to Troubleshoot Common Mini Excavator Hydraulic Issues
Hydraulic Cylinder Performance & Drift Fixes
A mini excavator earns its reputation on the strength of its hydraulics, and when something goes wrong in that system, productivity grinds to a halt fast. Whether you run a single machine on a landscaping crew or manage a fleet of diggers across job sites, you need a clear, repeatable way to find the root of a hydraulic problem instead of guessing your way through expensive part swaps. The good news is that most common faults follow predictable patterns, and once you learn to read the signs, you can diagnose them with basic tools and a methodical approach. This guide walks you through the five areas wherehydraulic trouble usually starts, giving you practical steps to isolate each issue before it sidelines your machine. We focus on what you can actually check, what symptoms point toward which failure, and how to protect the costly components that keep your excavator working. Treat these sections as a troubleshooting roadmap you can return to whenever performance drops off, controls feel sluggish, or the machine behaves in ways that do not match the job in front of it. Working through problems in a logical order saves you time, money, and the frustration of chasing the wrong fault.
Hydraulic Fluid and Leak Management
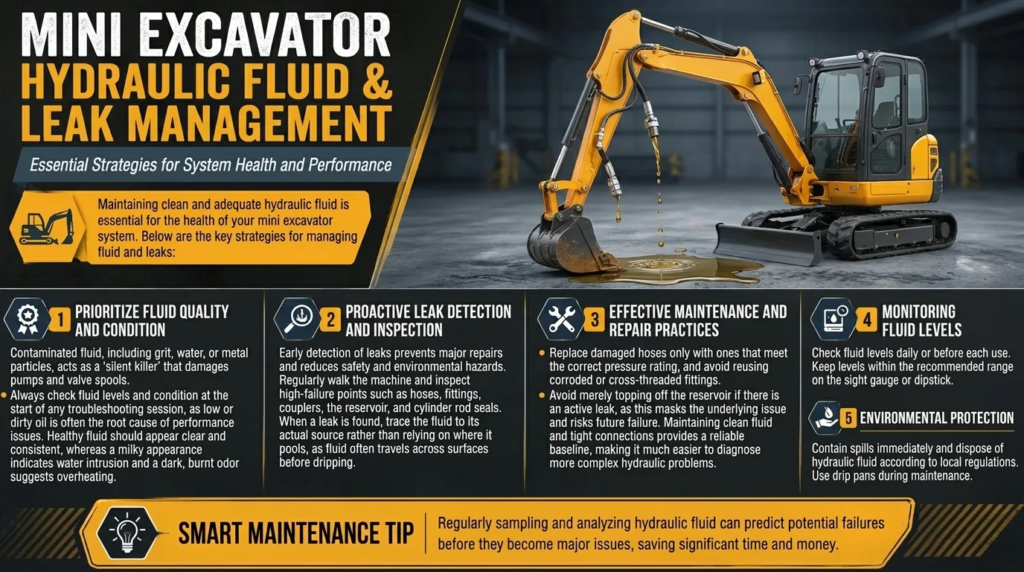
Clean, adequate hydraulic fluid is the lifeblood of your mini excavator, and maintaining it is the single most important thing you can do to keep the system healthy. Contaminated oil is a silent killer that grinds away at pumps, scores valve spools, and clogs the tight tolerances that precision components depend on, so the moment grit, water, or metal particles enter the fluid, the clock starts ticking on a failure. Begin every troubleshooting session by checking the fluid level and condition, because low or dirty oil explains a surprising number of complaints. Healthy hydraulic fluid should look clear and consistent, while a milky appearance signals water intrusion and a dark, burnt smell points to overheating or breakdown of the oil. Equally important is staying ahead of leaks, which rob the system of pressure, create dangerous slick spots, and pose a real environmental hazard if oil reaches soil or water. Catching a leak early often means the difference between a quick hose replacement and a major repair. As part of your routine, walk the machine and inspect carefully, paying close attention to the points that fail most often:
- Hoses and fittings, looking for wetness, drips, swelling, or chafing where lines rub against the frame
- Couplers and quick-connects, which loosen with vibration and weep at the seals over time
- The reservoir and filler cap, where seepage or a damaged gasket lets contamination in
- Cylinder rod seals, which leave a telltale film of oil on extended rods
When you find a leak, trace it to its true source rather than the spot where oil collects, since fluid travels along surfaces before dripping. Replace damaged hoses with the correct pressure rating, and never reuse a fitting that shows cross-threading or corrosion. Topping off the reservoir without addressing the underlying loss only masks the problem and lets the level fall again at the worst possible moment. By keeping the fluid clean, the level correct, and every connection tight, you eliminate the most common hydraulic complaints before they ever reach the pump, and you build a reliable baseline that makes diagnosing the more complex issues in the sections below far easier and far more accurate.
Control Valve Diagnostics
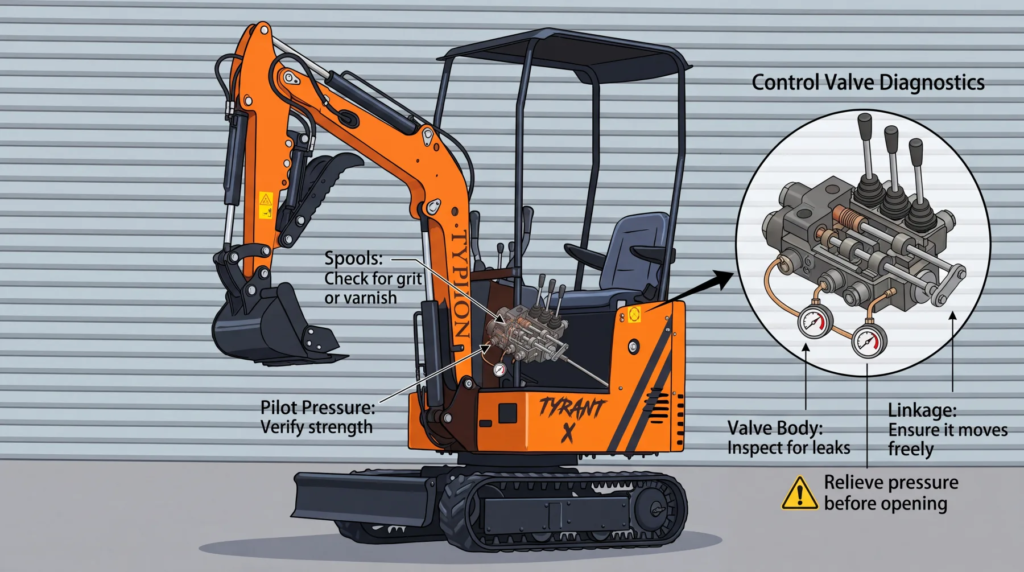
The control valve is the traffic director of your hydraulic system, routing pressurized oil to the boom, arm, bucket, swing, and travel functions in response to your commands at the joysticks. When this component sticks, wears, or fills with debris, you feel it immediately in the way the machine responds. Sluggish movements, controls that lag behind your input, functions that drift when they should hold steady, or a complete loss of response on one circuit all point toward the valve as a likely culprit. Because the control valve relies on precisely machined spools sliding inside tight bores, even small contamination or internal wear throws off the smooth, predictable flow you depend on for accurate work. Before condemning the valve outright, rule out the simpler causes upstream, such as low fluid, a clogged filter, or a weak pilot signal, since these mimic valve faults. Once you have cleared those, turn your attention to the valve itself and work through these checks:
- Inspect the spools for debris, since grit or varnish buildup can keep a spool from returning to neutral
- Confirm the linkage moves freely, because a bent or binding linkage prevents full spool travel
- Check pilot pressure at the valve, as a weak signal leaves the spool only partially shifted
- Look for external leaks around the valve body that signal worn internal seals
A valve spool that hangs up is one of the most common faults, and it often shows itself as a function that keeps creeping even after you release the joystick. In many cases, flushing the system with clean fluid and exercising the spool through its full range frees a sticky spool caused by varnish or minor debris. When wear is the true problem, you will notice consistent sluggishness across a circuit that clean fluid does not cure, and that points toward a rebuild or replacement of the affected section. Always relieve system pressure before opening the valve, and keep the work area spotless, because the very contamination you are chasing can be reintroduced during the repair. Restoring free, clean spool movement returns the crisp, precise control that lets an operator place a bucket exactly where the job demands.
Hydraulic Cylinder Performance
Hydraulic cylinders convert fluid pressure into the powerful, controlled motion that lets your excavator dig, lift, and curl, so when a cylinder weakens, the whole machine loses capability. The most common and frustrating cylinder problem is internal bypassing, where fluid leaks past worn piston seals inside the cylinder barrel instead of pushing the piston as it should. This internal leak causes the classic symptom operators call drift, where the arm, boom, or bucket slowly settles or retracts under its own weight even though the controls sit in neutral. Drift not only makes precise work nearly impossible but also signals that holding force is bleeding away, which can become a safety concern when a load will not stay put. Diagnosing a bypassing cylinder is straightforward once you know what to watch for, and you can isolate the failing component without major disassembly by observing the machine carefully. Run through this practical diagnostic sequence:
- Park on level ground, fully extend the suspect cylinder, and load it lightly with the attachment
- Mark the rod position with a piece of tape or a grease pencil at a fixed reference point
- Leave the machine stationary with the engine off and watch for slow retraction over several minutes
- Compare against other cylinders, since one drifting faster than the rest points to its own internal seals
If the marked rod creeps inward while everything else holds, you have strong evidence that the internal piston seals have failed and are allowing fluid to bypass. Before you commit to a teardown, confirm that the drift is not actually coming from a leaking control valve or a faulty hold valve, because those external causes can imitate cylinder bypass. Once you confirm the cylinder itself is at fault, the repair involves removing it, disassembling the barrel, and replacing the full seal kit, including the piston seals, rod seals, and wiper. Cleanliness during reassembly is critical, since a single nick in a new seal or a speck of grit returns you right back to the same drift. Restoring tight internal seals brings back the firm holding force and steady positioning that productive, safe excavation requires on every cycle.
Cooling System Maintenance
Heat is one of the most underestimated enemies of a hydraulic system, and on a compact machine packed into a tight engine bay, keeping everything cool takes more attention than many operators expect. Most people focus only on the hydraulic oil cooler, but the engine radiator and fan assembly play an equally vital role, because an overheating engine quickly drags the entire machine into trouble. Dust, mud, grass clippings, and fine debris pack into the fins of the radiator and cooler, choking off airflow until temperatures climb past safe limits. When the engine reaches a critical temperature, many modern mini excavators enter a protective limp mode that sharply restricts power and speed to prevent damage. This is where misdiagnosis happens constantly, because the sudden loss of performance feels exactly like a hydraulic pressure problem, sending technicians chasing pumps and valves when the real fault is a clogged cooling stack. Before you assume the worst about your hydraulics, work through these cooling checks:
- Inspect the radiator and oil cooler fins, clearing packed debris with low-pressure air blown from the engine side outward
- Check coolant level and condition, topping off and looking for the contamination that signals a deeper issue
- Examine the fan and belt, confirming the fan turns freely and the belt carries proper tension
- Watch the temperature gauge during operation to see whether overheating triggers the power loss
Cleaning the cooling package regularly is one of the easiest and most rewarding maintenance habits you can build, especially when working in dusty soil, demolition debris, or heavy vegetation that clogs fins fast. When you confirm that performance returns to normal after the engine cools and the cores are cleaned, you have saved yourself the time and expense of an unnecessary hydraulic repair. Pay attention to the surrounding seals and shrouding too, because gaps let hot air recirculate instead of pushing through the cores. By keeping the radiator, oil cooler, and fan assembly clean and functioning, you hold operating temperatures in the safe range, avoid the false alarms that limp mode creates, and protect both the engine and the hydraulic fluid from the accelerated wear that excessive heat always brings to a hardworking machine.
Electrical and Control System Troubleshooting
Today’s mini excavators blend mechanical muscle with a network of electronics, and that means a hydraulic complaint sometimes traces back to an electrical fault rather than the hardware itself. Sensors, solenoids, and electronic control units manage the pilot signals that tell the hydraulics what to do, and any one of them can fail independently while the pumps, valves, and cylinders remain in perfect condition. When a function stops working entirely, when the machine refuses to start, or when controls behave erratically, the electrical system deserves a close look before you open a single hydraulic line. The advantage here is that electrical diagnosis is fast and inexpensive when you have a multimeter and a wiring diagram in hand, letting you confirm or rule out faults in minutes. Approach the electrical side methodically, starting with the simplest possibilities and working deeper only as needed. Use this practical checklist:
- Check the fuses and relays for the affected circuit, since a single blown fuse can disable an entire function
- Inspect ground wires and connectors, because loose or corroded grounds cause intermittent, baffling faults
- Test the solenoids that control the hydraulic pilot signals, confirming they receive voltage and actuate
- Verify sensor readings against expected values to catch a unit feeding bad data to the controller
A blown fuse is the easiest win, so always start there, but resist simply replacing it without asking why it failed, because a repeated blow points to a short or an overloaded solenoid that needs attention. Loose ground wires deserve special suspicion on machines that vibrate hard all day, since a poor ground creates symptoms that come and go and drive technicians to distraction. When testing a solenoid that manages a pilot signal, confirm both that it receives the proper voltage and that it physically actuates, because a coil can read fine electrically yet still fail to shift. If a sensor reports values that do not match real conditions, the control unit may restrict hydraulic function based on that faulty information, mimicking a mechanical fault perfectly. By confirming clean power, solid grounds, healthy solenoids, and accurate sensors, you either solve the problem outright or clear the electrical system entirely, leaving you confident that any remaining fault truly lives in the hydraulic hardware.
2. Control Valve Diagnostics
The control valve routes pressurized oil to the boom, arm, bucket, swing, and travel functions. When it sticks or wears, controls become sluggish or lag, which is a major symptom to look for during mini excavator hydraulic troubleshooting.
Step-by-Step Valve Checklist
Before condemning the valve outright, rule out low fluid, clogged filters, or weak pilot signals. Then, perform these mechanical checks:
- Inspect the spools: Ensure grit or varnish buildup isn’t keeping a spool from returning to neutral.
- Confirm linkage movement: Ensure a bent linkage isn’t preventing full spool travel.
- Check pilot pressure: A weak signal leaves the spool only partially shifted.
- Look for external leaks: Check for worn internal seals around the valve body.
3. Hydraulic Cylinder Performance & Drift Fixes
Hydraulic cylinders convert fluid pressure into digging power. The most common failure is internal bypassing, where fluid leaks past worn piston seals inside the cylinder barrel, causing the arm, boom, or bucket to slowly settle (drift) under its own weight. Identifying this drift is a core part of mini excavator hydraulic troubleshooting.
The Cylinder Drift Diagnostic Sequence
- Park on level ground and fully extend the suspect cylinder.
- Load it lightly with the attachment.
- Mark the rod position with tape or a grease pencil at a fixed reference point.
- Turn off the engine and watch for slow retraction over several minutes.
If the marked rod creeps inward while others hold, your mini excavator hydraulic troubleshooting process has successfully isolated a failed internal piston seal, which will require a seal kit replacement. You can learn more about finding matching replacement parts in our mini excavator maintenance guide (Internal Link placeholder).
4. Cooling System Maintenance
Overheating is a primary enemy of hydraulics. Dust, mud, and grass clippings pack into the fins of the radiator and oil cooler, choking airflow. When the machine overheats, it may enter a protective limp mode, causing a sudden loss of performance that mimics a hydraulic pump failure—a common point of confusion in mini excavator hydraulic troubleshooting.
Critical Cooling Checks
- Clear debris: Blow out radiator and oil cooler fins with low-pressure air from the engine side outward.
- Check coolant level: Ensure proper levels and check for cross-contamination.
- Examine fan and belt: Confirm the fan turns freely and the belt has proper tension.
5. Electrical & Control System Troubleshooting
Modern mini excavators blend mechanical muscle with electronics. Sensors, solenoids, and electronic control units (ECUs) manage the pilot signals. A hydraulic issue can often just be an electrical fault, making electrical isolation an invaluable phase of mini excavator hydraulic troubleshooting.
Electrical Checklist
- Fuses & Relays: Check for blown components on the affected circuit.
- Ground Wires: Inspect for loose or corroded grounds caused by machine vibration.
- Solenoids: Test that they receive proper voltage and physically actuate.
- Sensors: Verify sensor readings to ensure the controller isn’t getting bad data and forcing limp mode.
For advanced wiring schematics and electrical sensor specifications, refer to the official Mini Excavator Manufacturer Directory (DoFollow External Link).
Conclusion
Mastering mini excavator hydraulic troubleshooting doesn’t have to feel like guesswork. Working from simple to complex—starting with fluid levels, moving to valves and cylinders, and ruling out cooling or electrical faults—saves you time, money, and the frustration of replacing functioning parts.
Always respect system pressure and cleanliness at every step to keep your machine working hard for years to come.
