Hydraulic Cylinder Inspection and Repair for Compact Excavation Equipment
Hydraulic cylinders do the heavy lifting on every compact excavator. When an operator moves a control, pressurized oil enters a cylinder and pushes a piston and rod, raising the boom, curling the arm, rotating the bucket, angling the blade, or swinging the boom offset. On spider excavators and other specialized compact machines, cylinders also position the support legs that keep the machine stable on uneven ground. Precise, controlled excavation depends on cylinders that respond exactly as the operator expects.
Few components work harder. Cylinders absorb shock when the bucket strikes rock, cycle thousands of times per shift, and operate surrounded by mud, abrasive dust, rain, and freezing temperatures. Over time, seals wear, rods pick up scratches, pins loosen in their bores, and small leaks begin to form. These problems rarely stay small. A minor rod scratch can tear a brand-new seal. A weeping rod seal lets dirt into the cylinder. A worn pin throws the cylinder out of alignment and accelerates wear on surrounding parts. Most importantly, a cylinder that drifts or moves unpredictably reduces the operator’s control of the boom and bucket, putting everyone nearby at risk.
Regular inspection catches these issues early, while repairs are simpler and less costly. Repair work itself demands discipline. Cylinders hold stored pressure and support heavy components, and careless disassembly can lead to fluid injection injuries, sudden drops, and crushing hazards. This guide covers how to inspect and repair hydraulic cylinders on compact excavation equipment safely and effectively, across six key areas: checking for external leakage, inspecting cylinder rod condition, checking pins and mounting points, recognizing performance changes, safe cylinder repair, and testing after service.
Inspecting Cylinder Rod Condition
Understanding why rod damage matters is essential. A scratch or raised burr acts like a blade against the rod seal and wiper. Replacing a seal without addressing rod damage often means the leak returns within a short period of operation. Always inspect the rod carefully before any seal replacement. Also check the wiper seal, which sits at the outer edge of the gland and scrapes contaminants off the rod as it retracts. A torn, hardened, or missing wiper allows abrasive particles into the rod seal area, accelerating both seal wear and rod damage.
Protecting rods comes down to consistent habits. Where the manufacturer’s parking instructions allow, retract cylinders when parked so rods are mostly protected from weather and impact. Plan digging and loading movements to avoid striking rods against rock faces, trench walls, trucks, or structures. Use rod guards where the machine provides them, and keep them maintained. When cleaning rods, use a soft cloth and approved methods. Never scrape rods with metal tools or abrasive pads. In wet, salty, or corrosive environments, increase inspection frequency and consider manufacturer-approved protective measures.
When you find rod damage, record its location and size and monitor whether it worsens. Minor surface marks may fall within acceptable limits, but deeper damage, bent rods, or flaking chrome usually call for professional assessment. A qualified technician should decide whether the rod can be repaired, refinished, or must be replaced based on the manufacturer’s limits.
Key takeaway: Inspect exposed rods for scratches, dents, corrosion, damaged chrome, and bending, recognize that rod damage will quickly destroy new seals, and protect rods by retracting cylinders when parked and avoiding impact during work.
Checking for External Leakage
External leakage is usually the first visible sign that a cylinder needs attention. A routine walk-around can reveal leaks long before they affect performance, as long as you know where to look and how to do it safely.
Before inspecting, park on firm, level ground. Lower the boom, arm, and bucket fully to the ground, and lower the blade. Shut down the engine and remove the key. Allow hot components to cool, since cylinders, hoses, and fittings can reach temperatures high enough to cause burns. Remove mud and buildup where needed so you can see each component clearly.
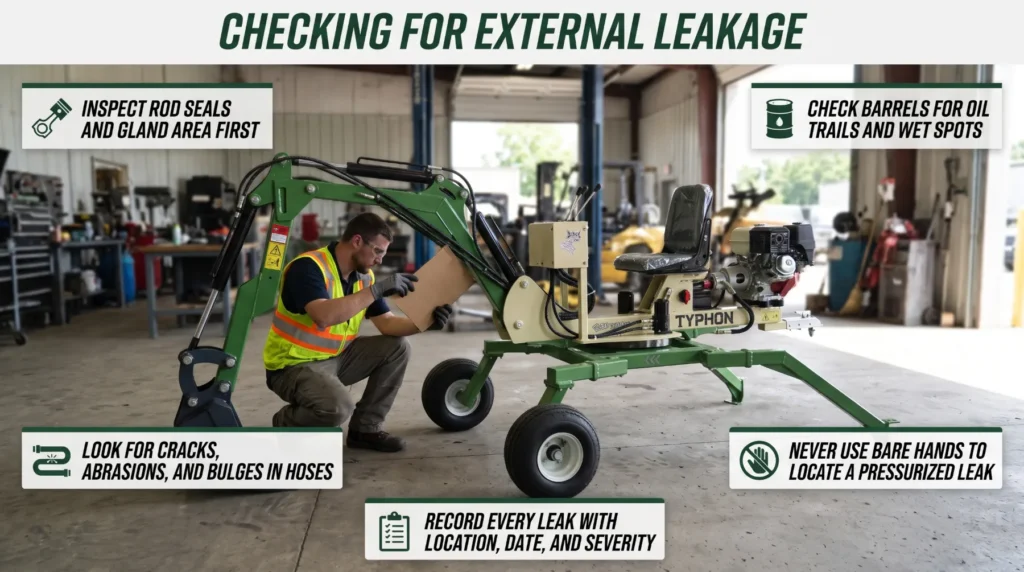
When inspecting, work from end to end on each cylinder. The point where the rod exits the cylinder is the most common leak location, so start at the rod seals and gland area, looking for oil on the rod, around the gland or head, and collecting on the barrel below. Check the cylinder barrels for oil trails, wet spots, dents, and cracked welds, especially near ports and end caps. Inspect hoses for cracks, abrasion, bulges, and worn outer covers, paying particular attention to hoses that rub against the boom, arm, or other components. Check fittings and ports for seepage, loose connections, and damaged threads, and look along any hard lines for dents, cracks, and loose or missing clamps.
Never use bare hands to locate a pressurized leak. Oil escaping from a pinhole under pressure can penetrate the skin even when the stream is too fine to see. A fluid injection injury may look like a minor puncture, but it can cause severe tissue damage and requires immediate medical attention. Always use a piece of cardboard or wood to locate suspected leaks, wear gloves and safety glasses, and keep your face and body away from suspected leak points. Record every leak you find, noting the location, severity, and date, since tracking leaks over time shows whether a condition is stable or worsening and helps you schedule repairs before a seal fails mid-job.
Key takeaway: Inspect rod seals, barrels, hoses, fittings, and lines with the machine safely shut down, treat active leakage as a condition requiring prompt attention, and always use cardboard or wood, never bare hands, to find a pressurized leak.
Checking Pins and Mounting Points
A cylinder can only perform correctly when it is firmly and accurately connected to the machine. Pins, bushings, retaining hardware, and mounting brackets transfer every digging, lifting, and breakout force between the cylinder and the machine structure. These connections deserve the same attention as the cylinder itself.
Each component in the assembly plays a specific role. Pins connect each end of the cylinder to the machine frame, boom, arm, or linkage, allowing the cylinder to pivot as it moves. Bushings provide a replaceable wear surface between the pin and its bore, protecting more expensive structural parts. Retaining hardware, including bolts, keeper plates, snap rings, and lock pins, holds each pin in position and prevents it from rotating or working loose. Mounting brackets and lugs carry the cylinder’s loads, and grease fittings deliver lubricant to the pin and bushing surfaces.
During inspection, look for looseness and excessive play, visible gaps between pin and bushing, or a clunk when the function changes direction. Oval-shaped bores, grooved pins, or bushings worn thin or pushed out of their housings all signal wear that needs attention. Inspect brackets and lugs for hairline cracks, and watch for rust-colored streaks or fresh paint cracking near a weld, which can reveal a crack beneath. Missing or damaged retainers, such as a missing bolt, broken keeper plate, or absent snap ring, can allow a pin to rotate, wear its bore, or work its way out. Also check grease fittings for damage or clogging, and confirm fresh grease is reaching the joint after lubrication.
Checking for movement should be done safely. Many technicians check for play by having the operator apply light pressure to a function with the bucket resting on the ground while the inspector watches the joint. If you use this method, the operator must remain seated with full control, the inspector must stand well clear of pinch points and the attachment’s range of movement, and both people must agree on clear signals before starting. Never place hands or fingers near a joint that can move.
Key takeaway: Inspect pins, bushings, retainers, and mounting brackets for looseness, wear, cracks, and missing hardware, check for movement only from a safe position with clear signals, and keep joints lubricated to protect cylinder alignment.
Safe Cylinder Repair
Cylinder repair combines heavy components, stored hydraulic energy, and precision parts. Done correctly, it restores reliable control. Done carelessly, it causes serious injuries and repeated failures. Cylinder disassembly and seal replacement should be carried out by qualified personnel with the right tools, technical information, and pressure-control procedures.
Start by gathering the right resources. The service manual provides model-specific procedures, torque values, seal arrangements, and assembly sequences. Use the seal kit specified for the exact cylinder, since genuine or manufacturer-approved parts ensure correct materials and dimensions. You will also need specialized tools including gland or spanner wrenches, seal installation and sizing tools, pick tools with rounded edges, and a calibrated torque wrench. Hoists, slings, and stands rated for the cylinder’s weight are essential, since many excavator cylinders are too heavy to handle manually. A clean bench, lint-free rags, and caps and plugs for open ports and hoses round out the preparation.
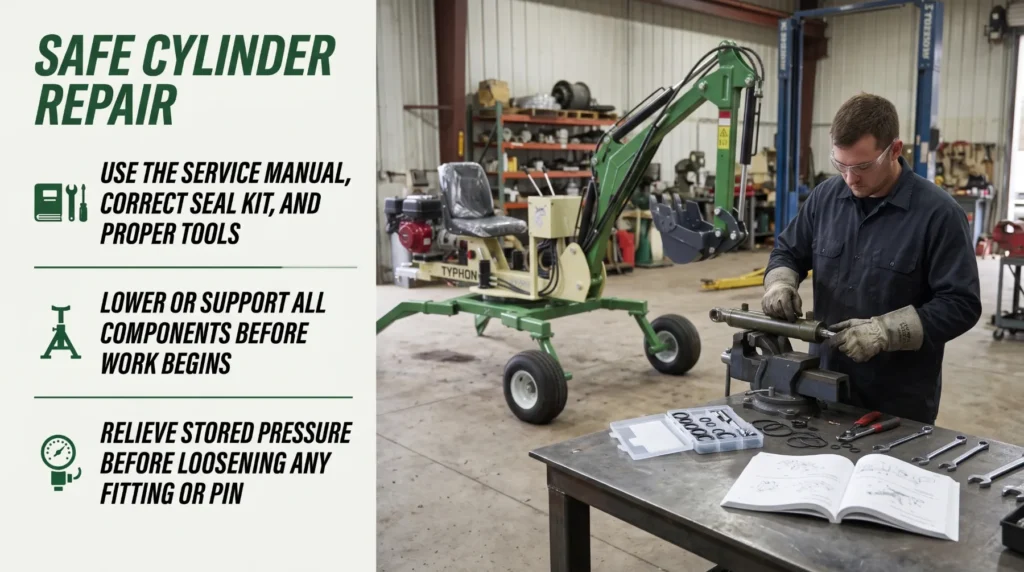
Before loosening anything, secure the machine and supported components. Park on firm, level ground and lower the boom, arm, bucket, and blade fully to the ground wherever the procedure allows. Where a component cannot be lowered, support it with approved stands, cribbing, or lifting equipment rated for the load as the service manual specifies. Never rely on hydraulic pressure alone to hold a component in place. Shut down the engine, remove the key, and apply lockout and tagout according to site procedures. Allow oil and components to cool.
Relieving stored pressure is a critical step that must not be skipped. Shutting down the engine does not always release all pressure. Follow the manufacturer’s procedure, which commonly involves cycling the controls with the key in the run position and the engine off, and relieving pressure in accumulators where fitted. Never loosen fittings or remove pins while the component carries load or stored pressure. Loosening a fitting on a pressurized cylinder can release a high-pressure stream of oil and cause an injection injury. Removing a pin from a cylinder holding a boom, arm, or leg can allow the component to drop or swing suddenly.
When disconnecting and removing the cylinder, clean the exterior and connections before disconnecting to keep dirt out. Label hoses so they are reconnected correctly, and cap and plug open hoses and ports immediately. Support the cylinder with lifting equipment before removing the final pin, and keep hands clear of the pin bore as the load transfers.
During disassembly, secure the cylinder on a stable bench or fixture, remove the gland, and withdraw the rod and piston in a controlled manner, supporting the rod’s weight so it does not drop or scrape the bore. Never use compressed air to force a piston out of a barrel, since the piston can eject with dangerous force. Inspect every component, including the rod for straightness and surface damage, the barrel bore for scoring, the piston and gland for wear, and all grooves for damage. Replacing seals in a cylinder with a scored bore or damaged rod rarely solves the problem.
When installing seals, replace the complete seal kit rather than individual seals. Confirm each seal’s orientation, since many are directional. Use proper installation and sizing tools, lubricate seals with clean hydraulic oil as the manual directs, and avoid sharp tools that can nick seal lips. Tighten all hardware to the specified torque values. Never weld on a hydraulic cylinder or attempt to straighten a bent rod without the manufacturer’s approval.
Key takeaway: Use the service manual, correct seal kit, and proper tools, lower or support every component before work begins, relieve stored pressure, and never loosen fittings or remove pins while a component carries load or pressure.
Testing After Service
A repair is only complete once the cylinder has been reinstalled, bled of air, and proven to work safely. Careful testing confirms the repair and catches problems before the machine returns to production.
Reinstall the cylinder using the manufacturer’s procedure. Lift it into position with suitable lifting equipment, keeping hands clear of pin bores. Align the cylinder and install pins without hammering on hardened surfaces, using the approved alignment method. Install all retaining hardware, including bolts, keeper plates, and snap rings, and tighten to specified torque. Remove caps and plugs only as each hose is connected, confirm hoses match their labels, tighten fittings to the specified torque, check hose routing to prevent rubbing or kinking, and grease the pin joints. Top up the hydraulic reservoir with the specified oil using clean equipment and check the level using the manufacturer’s designated method.
Bleeding air from the cylinder is the next essential step. Air trapped in a newly installed cylinder causes spongy, jerky movement and can damage seals. Start the engine at low idle with the operator seated and restrained. Move the function slowly through partial strokes without bottoming the cylinder against its end stops. Gradually extend the stroke until the cylinder moves through its full range smoothly, then shut down, relieve pressure as required, and recheck the oil level.
Keep people clear during testing. Establish an exclusion zone around the boom, arm, bucket, blade, and support legs before the first movement. Only the operator should be within the machine’s reach. Anyone observing should stand in a safe, visible position outside the working range and use agreed signals. Never stand beneath a raised component, even during low-speed tests.
Test under low-risk conditions first by operating the function without load at low engine speed, then progress gradually to higher speeds and light loads before returning to normal work. After cycling, shut down and inspect the gland, ports, fittings, and every disturbed connection for leaks using cardboard or wood. Check for smooth, consistent travel without hesitation, chatter, or binding. Confirm the function holds position as expected, using the manufacturer’s drift test where specified, and verify that pins and retainers are secure with no unusual movement or noise.
If any leak, abnormal noise, binding, or drift appears, stop, lower all components to the ground, relieve pressure, and investigate before continuing. Document the repair by recording the date, operating hours, cylinder serviced, parts replaced, findings, and test results. Recheck the cylinder for leaks and the oil level after the first few hours of operation, since seals and fittings can settle in.
Key takeaway: Reinstall cylinders using the manufacturer’s procedure, bleed air with slow partial strokes at low idle, keep people clear of all moving parts during testing, check for leaks with cardboard, and confirm smooth, drift-free operation before returning the machine to work.
Conclusion
Hydraulic cylinder inspection helps detect problems before they affect excavation control or machine reliability. Routine checks for external leakage, performed with the machine safely shut down and never with bare hands, reveal failing seals and damaged hoses early. Careful rod inspection catches the scratches, dents, and corrosion that destroy seals, while protective habits such as retracting cylinders during storage extend rod life. Secure pins, sound bushings, intact retainers, and crack-free brackets keep each cylinder aligned and loads properly distributed.
Performance changes deserve equal attention. Slow movement, drift, and vibration can originate in valves, pumps, hoses, fluid, or controls, so accurate diagnosis looks at the entire circuit, and any drifting function is treated as a safety issue.
When repair is needed, safety depends on correct diagnosis, full pressure relief, secure support of every component, suitable replacement parts, and the manufacturer’s procedures. A controlled post-service test, with careful bleeding and a clear exclusion zone, confirms the work is complete. When your team applies these practices consistently, your compact excavation equipment delivers the precise, dependable control your crews rely on.
FAQs
Can a scratched cylinder rod be repaired?
It depends on the damage and the manufacturer’s repair limits. Light surface marks may be acceptable, while deep scratches, raised burrs, pitting, flaking chrome, or a bent rod usually require refinishing or replacement. A qualified technician should assess both the rod and the seal condition. Replacing seals over a damaged rod typically leads to repeated leaks, so the rod must be addressed as part of the repair.
What causes a hydraulic cylinder to drift?
Possible causes include internal piston seal leakage, valve leakage, or other hydraulic system faults. Leaking control valve spools, faulty load-holding valves, contaminated or overheated oil, and incorrect relief settings can all produce drift. Diagnosis should follow the manufacturer’s drift test and troubleshooting procedure. Until the cause is corrected, lower all components to the ground and keep the machine out of service, since a drifting boom or bucket is a serious hazard.
Is a leaking cylinder safe to keep using?
Active leakage requires the machine to be stopped and assessed before further operation. A leak lowers oil levels, draws dirt into the seal area, creates slip hazards, and may indicate a seal close to failure or a damaged hose that could burst. Pressurized leaks also carry a risk of fluid injection injury. Use cardboard or wood to identify the source, and have a qualified technician determine whether the machine can return to work.
Can cylinder seals be replaced without removing the cylinder?
Some designs permit certain repairs in place, but the method depends on the equipment and must follow its service instructions. Even in-place repairs require full pressure relief, secure support of every connected component, and contamination control. Many cylinders must be removed so the rod, bore, and piston can be properly inspected and the seals installed with the correct tools. Always follow the manufacturer’s procedure for your specific machine.
